Showing posts with label event photography. Show all posts

Wednesday, July 6, 2011

Point-and-Click Tips: Avoiding Overexposure and Underexposure When Taking Pictures Outdoors

Although digital point and shoot cameras are generally automated to measure the amount of light in an environment and apply the proper settings to take a good picture, the camera often makes an exposure decision that is incorrect due to complicated scene conditions. Most of the time, when a shot is underexposed, the details in the shadows can be recovered in Photoshop, while you can't fix a photo if the details are not there as the result of overexposure.


Overexposure: photos that are washed out, too bright, or have blown-out areas.

Direct bright light will create overexposure. To avoid it, as the first measure, make sure the sun is not shining into the lens while you are taking a picture. Sounds like the most obvious thing but you'll be surprised how many people don't think of it. It is recommended to put your subject in a shady area when shooting a sunny day.

Besides washing out the image, the harsh light creates a strong contrast where the highlights are too white and the shadows too black.

Uneven contract can be an eye sore. For example if the object's face is lit from the side the object's nose can create a strong shadow. When lt from above, the face will feature black spots in the undereye area, under the nose and on the chin. The camera can not automatically correct such effects. Use flash on the shade side to even out the exposure to light on both sides!

Underexposure: Photos that are underexposed look dark and lack details. When printed in large sizes they show pixelation instead of solid colors.

The obvious reason for underexposure is poor lighting. But it can also occur if there is a very bright light source in the photo. It can confuse the camera to believe that there is enough light in the scene for a low exposure setting. The result will be a photo that captures the bright area but darkens all the others.

To prevent underexposure you have to move closure to your subject and make sure your subject is the most well-lit element within the frame.

General: Outdoor photos can benefit greatly by overcast skies or by taking photos early in the morning or in the evening. Taking photos when the sun is at a 45 degree angle will result in richer colors.


Share this post on Tweeter

Bookmark and Share

Enhanced by Zemanta

Monday, May 18, 2009

Shooting for the Wedding Book

The wedding season hits in June and we at PhotoHand expect a rise in custom photo books design orders. Most of our clients have been in the wedding photography business for a while but there are a lot of talented young beginners who have been asking us to give them some tips on how to be prepared so that they are in the right place at the right moment and shoot enough material for a lively photo story.

We looked at the weddings albums that we have created so far and came up with this cheat sheet. A bride can also use this list when giving directions to her photographer.


A wedding is a celebration of a tradition and traditions by their nature adhere to certain scripts. Below are the points general to any wedding but if the wedding is to include some ethnic traditions or special family customs, that photographer must be notified of all such details beforehand so that he or she is able to capture every key moment.

Behind the Scene
The dress on a hanger
close-ups of any remarkable details on the dress
Accessories: flowers, shoes, jewelry, the rings
The bride getting ready (makeup, hair, jewelry, dress,shoes)
Family and bridesmaids assisting the bride
Others getting ready
Portrait of the bride
The groom getting ready (adjusting the ties tie or cuff links)
Portrait of the groom
Waiting for the Ceremony
The wide-angle view of the location
The groom waiting for the bride
The groom, the best man and the officiator
The ring bearer and flower girl
General view of the seated guests
Arrival of the bride

The Ceremony
The best man and maid of honor coming down the aisle
Each groomsman and bridesmaid coming down the aisle
The bride coming down the aisle
Wide-angle view of the ceremony
The vow and ring exchange
Signing of the marriage license
The kiss
The bride and groom coming down the aisle
Any special musician, singer, speaker, etc.

Formal Photos
Hands with the wedding bands
Formal group photos
Romantic bride and groom photos

The Reception
Details: centerpieces, the cake, decor
The wedding party entering the reception
Toasts
Cutting of the cake
The first dance
Dances with parents
Bouquet toss
Garter removal
Guests at each table
Dancing guests

Final Scene
The newlyweds waiving or walking away
Departing Limo

That's it! Have a great shoot!
Reblog this post [with Zemanta]

Friday, November 21, 2008

Capturing The Holiday Spirit


By Heather Joy Roth

The holidays that bring traditional family get-together are quickly approaching, offering us photographers – professional and otherwise - the opportunity to capture life-long memories of the colorful scenery and loved ones. Here are some tips that can help you take eye-catching portraits of the holiday season.

Take A Family Portrait

It is rare in this busy world for families to make the time to get together. Take advantage of this opportunity by taking a family portrait. It will be a cherished keepsake for everyone.

Capture Children’s Artwork On Camera

With school back in full swing, now is the time to take pictures of your children’s art projects. It is unlikely that you will be able to collect all their artwork for your child to see when they get older, so taking a snapshot — or better yet, having your child photograph their own artwork is not only a great way to remember childhood, but a creative way to get your budding photographer to enjoy the new hobby.

Capture Memories From A Different Point Of View

When photographing symbols of the holidays or loved ones, look for new, interesting ways of capturing them. You can photograph a carved pumpkin off-center or move in for an up close shot, leaving out distracting extras. Get level with the subject you are shooting.

Holidays mean children, and children are at a height level lower than what we usually photograph at. Get down on their level. This will give you the best picture angles you can achieve.

Spontaneous Photography

When it comes to the holidays, the time I most enjoy taking photos is when a family member or friend opens their gift. My motto is to shoot the portrait first, and ask questions later. Don’t waste time lining up a perfect shot, snap the photo and capture their face when they open their presents. Parents easily make the mistake of distracting their children by yelling at them to look at the camera.

This is a huge mistake, as children will either shy away from being photographed or pose wildly at the camera. If the children are not looking directly at the camera, not only will you not blind them with your flash, but you will be able to capture spontaneous moments rather than stiff poses.

These moments only lasts a split-second so if you can manage to shoot the subject in that moment of surprise, you’ll have a memory to last forever. Try getting restless children involved by having them take pictures of each other. This works especially well with digital cameras. You will be surprised at what they come up with. Kids literally have a different perspective on the world and their images may surprise you.

Broaden What Type Of Holiday Picture You Take

Try capturing not only “classic” symbols of the holidays, but abstract points of interest. For example, you could photograph a tree covered in snow and this can convey the feeling of the season even more than a photograph of the Christmas tree itself. Look for pumpkin patches, snowmen, even leaves on the sidewalk for inspiring, innovative photo opportunities.

Create Your Own Holiday Greeting Card

© PhotoHand |custom designed greeting cards

© PhotoHand |custom designed greeting cards

Greeting cards that you buy in the store are cheerful, but nothing says “Happy Holidays” more than a personalized greeting card you snapped yourself. Get creative, whether you take a portrait of yourself, your pets, family or even a landscape shot. I prefer receiving these cards versus commercial greeting cards. It shows that thought and consideration went into the card and always brings a smile to my face. These are the cards I keep.

Take A Lot Of Photos

Any professional photographer will tell you that to get a few amazing shots, they had to snap hundreds of photos. Do not be stingy with what you shoot. Try taking pictures of anything that catches your eye. A simple, spontaneous close-up snapshot of some Christmas lights can be more eye-catching than a well planned shot of the whole tree lit up.

Remember, the holidays are a time for family, friends and memories.

Capture the holiday spirit by taking spontaneous shots, not by ordering your subject to pose this way or that way. These photographs allow the happiness of the season to radiate throughout your photography.
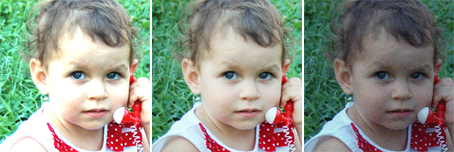
Defining Your Image Size for Quality Printing

This is the question that we, at PhotoHand, get every day – why can’t you blow up my photo into a poster after you have retouched it. The answer is that the size of the photo is too small. To print a small poster – the size of a standard sheet of paper, your photo has to be at least 5 Megapixels in photo terms, which equals 5 Megabytes in computer terms.

A photo image is described by two parameters: “Image Size” and “Image Quality”. The image SIZE is defined by the total number of pixels - a collection of small dots. The number of pixels per square inch defines the QUALITY of the image.

If the number of pixels (the size) of the image can’t be changed after the image has been captured, the image quality is defined AFTER you have taken the photo. Image quality or resolution will be defined when you decide how many pixels (dots) should be per square inch of your photo.

More pixels/dots per square inch mean higher resolution and subsequently higher quality of print. 72 dpi (dots per inch) are perfect for the web but not for printing. Quality printing requires 300 dpi.

So, the more pixels you capture from the start, the bigger photo you will be able to print after these pixels have been squeezed into square inches by 300 in each.

Here is a sample of calculations:

Suppose you want a print sized 4 by 6 inches in photo quality.
(4in x 300dpi) x (6in x 300dpi) = 1,200 pixels x 1,800 pixels
This equals 2,160,000 pixels (roughly 2.2 Megapixels) in total which is approximately 2.2 Megabytes.

To make it easier, we put together this cheat sheet for you.


We hope we were able to help, but if you still have questions please contact us through our website www.PhotoHand.com.